VERSION B
Offline Calibration Guide:
This guide if for those who have Hawks installed and connected to PC’s that do not have internet access. It describes how to calibrate the GCHawk once it is mounted in place and in the event the PC connected the GCHawk does not have internet access. You will need some way to save a file and bring it to a computer with internet access.
1. From a PC with internet access, download the ‘Hawk Calibration App’ from the GCHawk Guide: GCHAWK RELATED RESOURCES
2. Once downloaded, move the ‘Hawk Calibration App Setup 1.0.0.0.exe’ to the computer connected to the GCHawk and double click it to install the ‘Hawk Calibration App'
3. Ensure the GCHawk is connected to your PC through Ethernet, and power on the GCHawk.
4. Launch the ‘Hawk Calibration App’
5. Click ‘Refresh’ at the top and select the GCHawk with your serial number from the dropdown menu.
6. Click ‘1. Start Wand Dance’
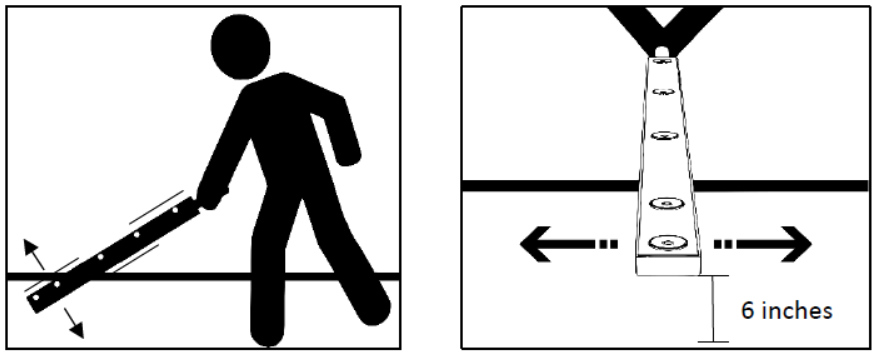
7. With your arm down towards the ground and the tip of the wand no more than 6 inches from the ground, move the Calibration Wand slowly around the hitting zone like a metal detector.
- Keep the white dots on the wand facing the GCHawk.
- Blue and red dots will appear on the screen as you move the wand around.
- You want to try and fill the grids on the screen with dots so each box turns green.
- The long grey box is the position of the Hawk.
See the images below of how to move the wand around.
8. All boxes must turn green. The middle boxes on the right side overlap so make sure the center area is dark green. Once all boxes are green, click ‘2. Stop Wand Dance’.
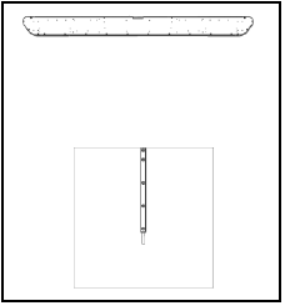
9. During these next few steps we will set the zero azimuth (zero left/right shot angle) and zero shot elevation angle for the system so please align the Wand carefully.
- Place the Wand on the hitting surface at the center line of the system with the white dots facing up and the tip pointing down range towards the screen/hitting direction.
- The distance away from the screen does not need to be precise but must be near the hitting zones. If you have a properly positioned mat you can align it to the front of the mat as shown. If you plan to align your system to the video projection screen you should measure and record the distance from the tip of the Wand to the projection screen.
See the image below for how this placement should be.
10. Click ‘3. Zero Azi Wand’. You should see “Capturing zero azimuth wand succeeded!” in the log if successful.
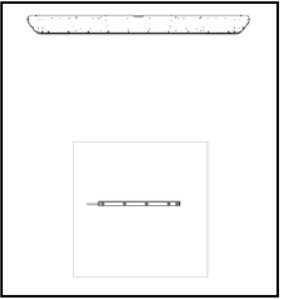
11. Place the Wand on the hitting surface, centered on the tees with the white dots facing up and at an angle that is approximately 90 degrees to the hitting direction.
See the image below for how to place the wand.
12. Click ‘4. Orthogonal Wand’. You should see “Capturing orthogonal wand succeeded!” in the log if successful.
13. If performed successfully, the button ‘6. Calibrate’ will become active.
14. Then click ‘5. Save Data’
15. In ‘C:\Program Files (x86)\Hawk Calibration App’ there should now be a file named ‘WandSamples.json’.
- Email this file to your support contact at Foresight Sports for processing. Please include the serial number of your device in the email, which is on a sticker attached to the back of your GCHawk.
16. Foresight Sports will return a file named ‘CAL_E.SN00000.bin’. The 00000, will be different depending on the serial number of your GCHawk.
17. Connect a USB-C cable from the back or your GCHawk to a PC that has the CAL_E.SN00000.bin’ on it.
18. The GCHawk will act like a Thumb drive and should be visible in Windows File Explorer. Select ‘Foresight Sports GCH’ and open the GCHawk storage. See image below:
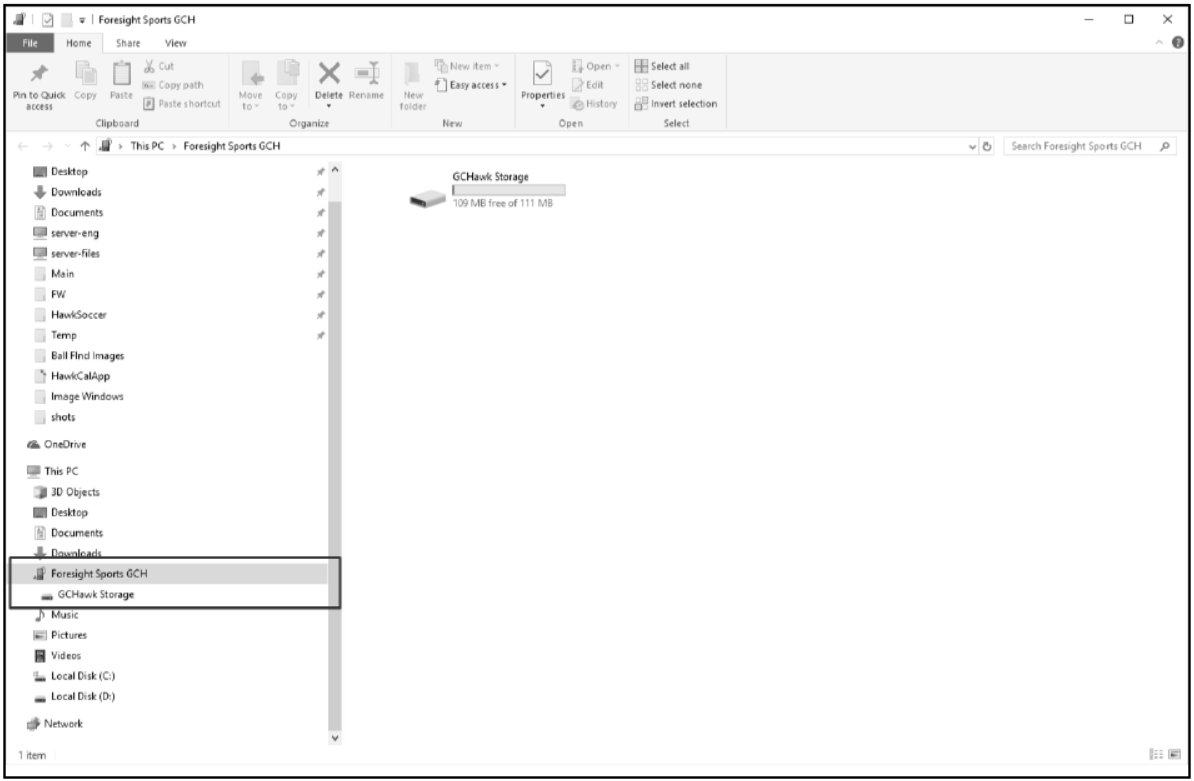
19. Drag and drop the ‘CAL_E.SN00000.bin’ into the GCHawk Storage.
20. Turn off the GCHawk, wait at least 5 seconds and then turn the GCHawk it back on, this completes the calibration process.