Configuring the Simulator Setup Tool
In this guide, you will learn how to configure your simulator setup tool. This tool adjusts the software's 3D environment, matching it closely to your physical environment, which allows for a seamless experience.
To open your simulator setup tool, use the Windows search feature from your taskbar. This search bar (or magnifying glass icon) is typically in the lower-left corner of the taskbar but ould be in a different location depending on how your Windows PC is configured. You can also click the start icon  and start typing to search.
You should see this search box appear with the populated results: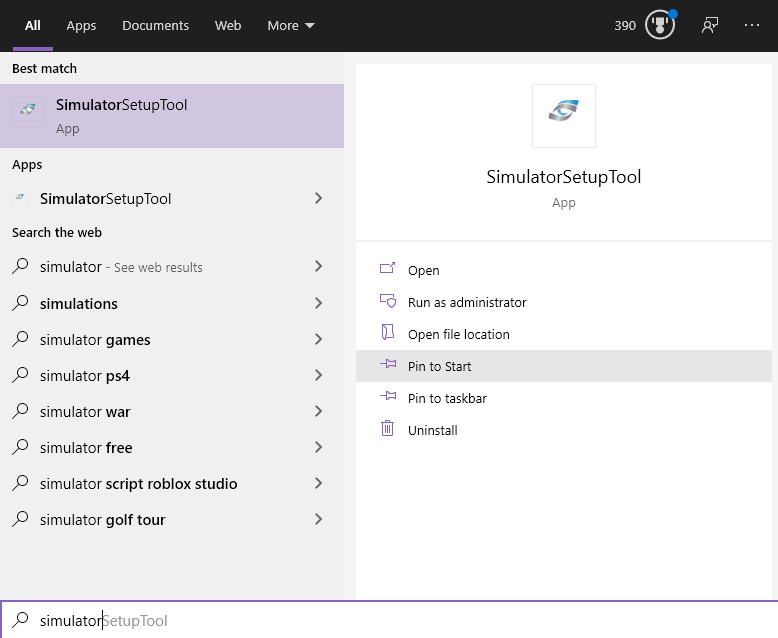
Right-click the icon and Run as administrator or select Run as administrator below the icon.
When the program opens, it will look like this: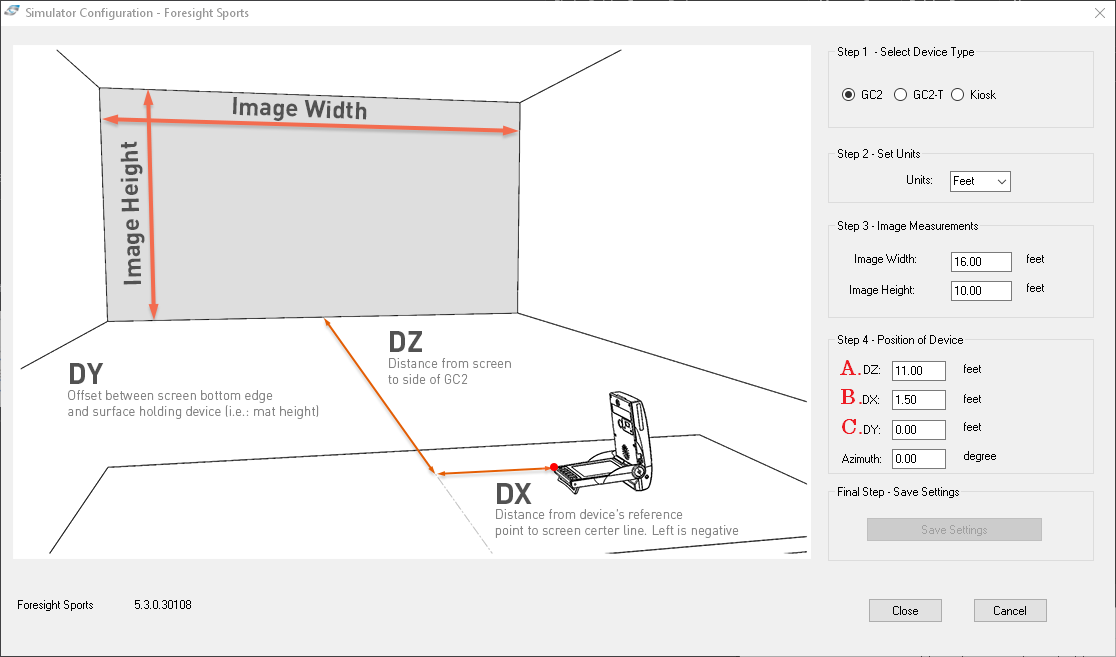
If you are not using a projector and a hitting screen (i.e. you are hitting into a net) you can use these default parameters:
- Image Height: 16ft
- Image Width: 9ft
- DZ: 11ft
- DX: 1.5ft
- DY: 0
- Azimuth: 0
If you are using a projector and impact screen, you will adjust the parameters in each of the steps.
- Step 1. Pick your launch monitor type
- Step 2. Set your desired units of measurement. The tool will convert between all units of measurement.
- Step 3. Insert the measurements for the projected image (not the actual screen size).
- Step 4. The lettered steps below configure the 3D environment in relation to your launch monitor's position.
A. DZ is the distance from the screen to the side of your launch monitor.
B. DX is the launch monitor's distance from the centerline.
C. DY is used when you have a raised hitting mat.
Note: Azimuth is typically always zero.
Once you are satisfied with your entries, save the configuration and exit the application.
Congratulations! You are done configuring your Simulator Setup Tool.
Related Articles
Setup Computer Power Settings
Recommend for Simulation Use - Setup Power Settings Related to All windows versions Open Control Panel > System and Security > Power Options Select “Change plan settings” next to the selected power option. Change all drop down options to never, may ...Accessing The Room Configuration Tool - Adjusting Target Line In Software
In order to adjust the target line (aim line or center line) within your software you must access the Room Configuration Tool. This is a application, separate from the Simulation Software. To do this please see the steps below: 1. Open your WINDOWS ...Using GCHawk Diagnostic Tool to Capture Device Log File
This guide will show you how to use the GCHawk Diagnostic Tool (or HDT for short) to allow your GCHawk to produce a complete LogFile, This file will provide a complete record of device communication and errors. 1. Download and install the latest ...Managing Simulator Bay Scheduling & Access (Third-Party Example)
Many facility owners seek to control or automate simulator bay access — ensuring customers only use bays during paid or scheduled sessions. While Foresight Sports does not currently provide a built-in scheduling or access-control feature, several ...MyBag User Setup
MyBag links your launch monitor data to the Bushnell Golf App and Pro X3 rangefinder to generate personalized yardages and club recommendations based on real conditions. ⚠️ Important: MyBag requires both of the following: A Foresight Sports Launch ...